What is Lighting in Blender
Welcome to Blender Basics, lets do some 3D!
In a 3D scene there are 3 main components: objects, materials, and lights. In a 3D scene, lights have the purpose of creating a sense of depth and illuminating objects in the scene. The proper use of lighting will add mood, atmosphere, and emphasis to a scene, helping it seem more believable and immersive to the viewer.
In Blender there are 4 light objects: point, spot, lamp, and sun. Each have their own uses, ranging from acting as the sun to the headlights on a car. The other option is the world environment that provides overall lighting.
What are the Different Types of Light Objects
Every light object will always contain these 2 inputs; color and power. The color is pretty self-explained, its the color of the light. The power is adjustable in units of watts. A higher value will increase the intensity of the light. A negative value will darken or remove light.
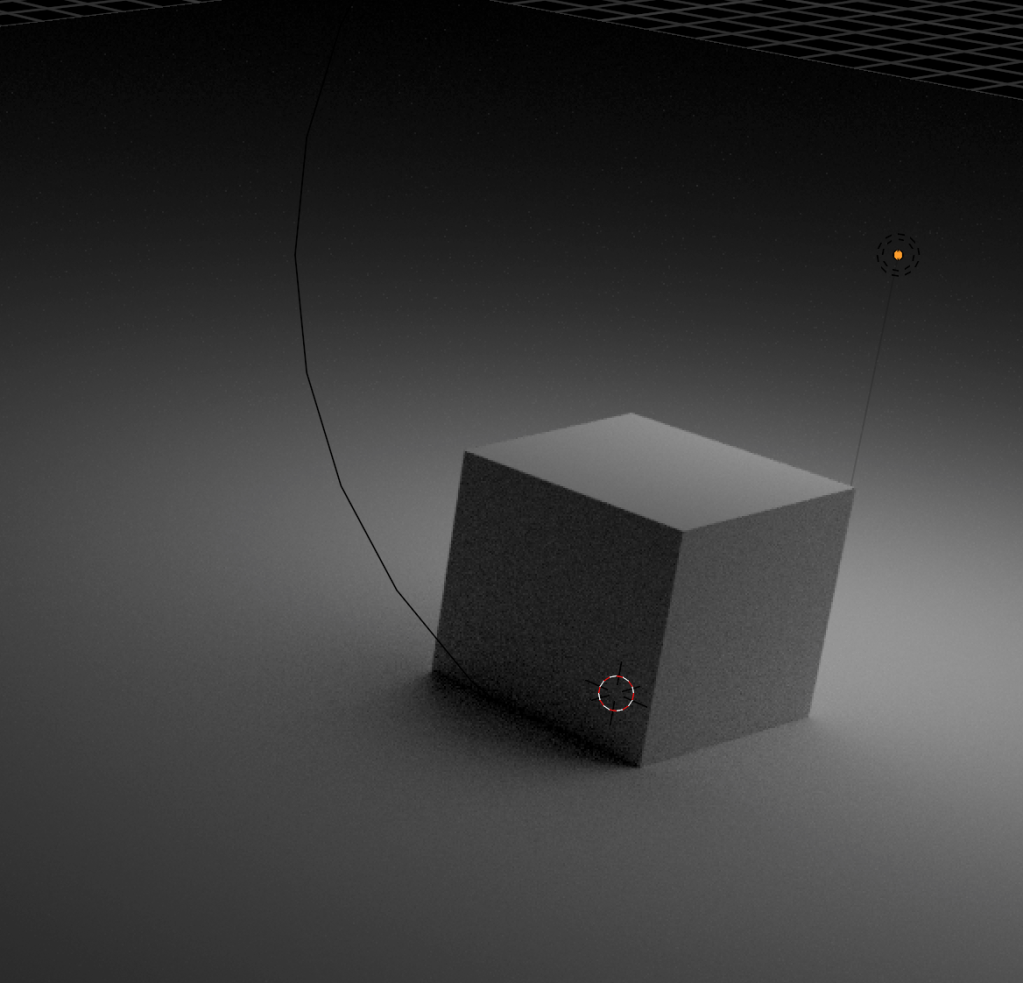
What is the Point Light
Point lights are the simplest type of light in Blender. They emit light in all directions from a single point. The light intensity in point lights will gradually lessen until it has disappeared, making it useful for creating small light sources such as lightbulbs, candles, or lanterns. Users can adjust the color and intensity of point lights, as well as the distance at which they emit light, allowing for greater control. The secondary use for point lights is creating ambient light. This light will fill in the shadows and provide a general illumination to a scene.
The radius will change how soft the shadows are. A large value will have soft shadows and a lower value will have hard shadows.

What is the Spot Light
Spot lights emit light in a specific direction, creating a cone of light. They are commonly used to create focused light sources, such as stage lights, flashlights, or car headlights. Users are able to adjust the angle and width of the spotlight’s cone, as well as its color and intensity. Spotlights are also useful for creating shadows and adding depth to a scene. They are able to highlight certain objects and create contrast with unlit areas.
The radius will change how soft the shadows are. A large value will have soft shadows and a lower value will have hard shadows. The size will determine how large is the area covered by the spot light. This value is adjustable between the ranges of 1 and 180. The final control is blend. Blend controls the fallout of the light.

What is the Area Light
Area lights are a type of light object that emits light from a rectangular or circular surface. They are used to simulate large light sources such as windows, studio lights, and overhead lamps. Contrasting point or spot lights, they provide a more natural and diffused light. The most powerful thing about area lights is the ability to illuminate objects from multiple angles.
The shape will determine the form of the light. The 4 options are rectangle, square, disk, and ellipse.


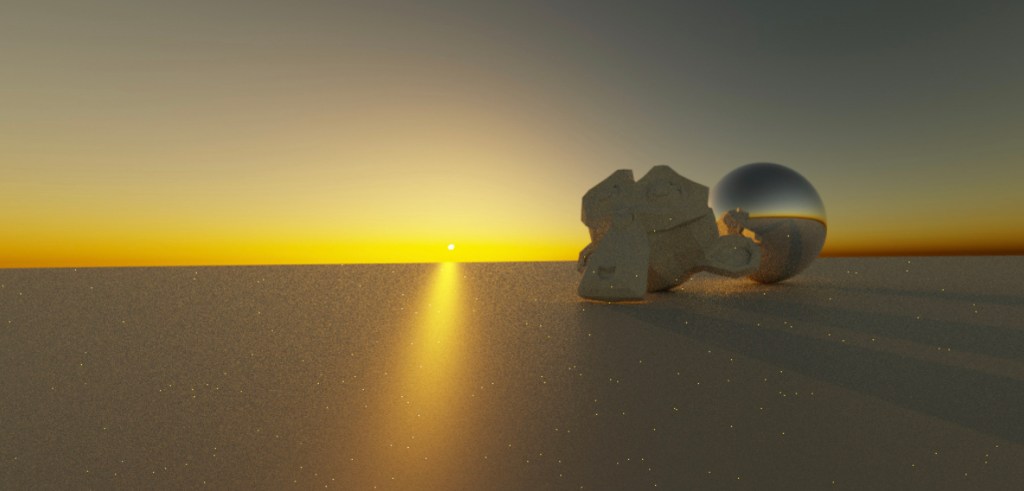
What is the Sun Light
Sun lights are used to simulate the light emitted by the sun(no surprise). They are directional lights that emit light in a specific direction, very similar to area and spot lights. Sun lights are useful for creating outdoor scenes as they create a sense of time and place. They unique thing about sun lights is that the light intensity will be even everywhere, meaning that the lighting is uniform.
How does the World Texture Work
The World Environment in Blender is the background and environment surrounding the objects in a scene. This environment texture provides a visual context for the objects to create a sense of depth and spatial relationships. The World Environment can be used to set the overall mood and atmosphere of a scene, as well as to provide a source of indirect illumination. The World Environment can be adjusted by changing its color and strength. In addition, special effects such as fog or haze can be added.
There are 2 options for the color input: a fixed color or a can be a world texture. The fixed color is the simpler of the 2 and is determined by a color wheel. The world texture is much more advanced than the fixed color input. By utilizing sky textures or an HDRI, you can have a realistic sky and lighting.
Sky Texture in Blender
The sky texture node in blender is a type of image texture that can create custom sky texture for simulating the sun and sky. When this texture is blended correctly blended with the background, the scene can really come to life.

HDRI(High Dynamic Range Image)
An HDRI is a texture that captures a range of brightness levels. They are able to control the amount of light, reflections, and shadows, creating a realistic and believable environments. They can affect the mood and atmosphere of a scene, making it a valuable tool for architectural visualization, product design, and environment design. Most users will use Polyhaven or the built in HDRIs in BlenderKit.

Conclusion
In conclusion, lighting is a crucial aspect of 3D modeling and animation. Through the use of virtual lights, HDRI images, and advanced lighting techniques, artists are able to create believable and realistic scenes. With the ability to preview changes in real-time, artists can easily fine-tune their lighting setups to achieve their desired look and feel.

Leave a comment