

How to Use UV Texturing in Blender
UV texturing and mapping is a fundamental technique used in almost all 3d software. This core process of 3D art involves applying 2D textures onto 3D models, which results in better renders. It begins with creating a UV map, which is a 2D representation of the 3d model’s surface. Then the 2d texture is mapped onto the UV map. UV mapping and texturing are a critical step in the 3D pipeline, enabling artists to add surface details, colors, and patterns to their 3D models without the use of procedural materials.
What is the UV Editor
The UV Editor is an essential tool used to map textures, edit the UV maps, and provide a visual representation of UV maps. With the use of the UV Editor, artists are able to align and manipulate the UV by adjusting the position, scale, and rotation of the UV map to get the desired look. Additionally, artists can create and edit seams to smoothen out the edges on UV maps. All in all, the UV editor is an indispensable tool to create high-quality textures for 3D models in Blender.
What is UV Mapping
UV mapping can be understood as cutting up a cardboard box. The cardboard box is cut along its edges by a pair of scissors, resulting in a flattened, two-dimensional layout of the box. Colors and designs are then applied to the flattened surface. The box is then reassembled, resulting in a box with textures. Likewise, UV mapping retrieves the UV map(the 2D representation of a 3D object), which is then used to apply textures. The UV map is wrapped back around the 3D model to create a realistic final product.
Advantages of UV Texturing
There are several advantaged to using UV textures over procedural materials. Firstly, UV texturing provides a quality of realism that procedural materials cannot match. This is because UV textures are images captured from the real world, giving them details that procedural materials cannot achieve. Secondly, UV texturing offers users a large amount of control over the texture. Artists are able to precisely map, cut, stretch/shrink, and arrange these pieces in the UV Editor. Finally, UV textures hold an advantage over procedural materials because they never repeat and always fit perfectly to the objects, making them ideal in complex or natural objects. A prime example is the human face. The wrinkles, pores, and other details on the skin do not occur in randomly, but in specific places. As a result, procedurally generated materials will result in an unnatural look.
What are the Disadvantages of UV Texturing
However, there are still some disadvantages of UV texturing. While many of these problems are challenging, they usually stem from a lack of experience and can be solved with practice and time. One such example is any stretching and distortion, resulting in a loss in detail and visual quality. However, this can be minimized by adjusting the UV map and texture placement. Likewise, seam lines are caused when the UV map is discontinued. These can be minimized with the careful placement of seams in areas hidden from view. This is another issue that has to be solved with experience and familiarity with the software.
The final disadvantage is the time it takes. UV texturing and mapping are extremely time-consuming, especially for complex models. The process includes unwrapping the models, flattening the UV map, and manually adjusting the texture to fix any artifacts. However, it is important to note that all the time added up results in a more realistic 3D models. While there may are some challenges in UV texturing, the benefits in realism and control over texture placement outweighs the disadvantages.
The Process of UV
Setting up the UV
To start, open up a new Blender file and keep the default cube. Yes, a little crazy. Next, move over to the shading viewport and add in an image texture. Open up the color file for your texture and link it with the base color.
Uv Editing Basics
When selecting faces in the right panel (edit mode), the selected faces will show up in the left panel (UV Editor). Just like in Edit mode, artists can select all faces by hot key “a”. To transform these faces, artists can use the hot keys “g” to move, “r” to rotate, and “s” to scale. Offering better control over the appearance of an object.
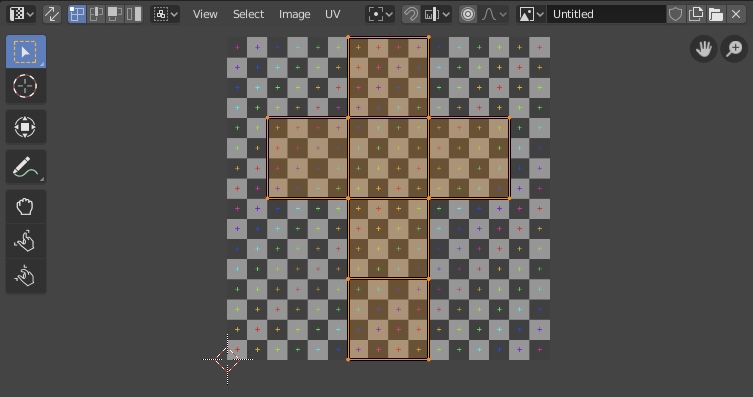
To fix broken UVs, the simplest method is to preform a UV unwrap.
While selecting all the faces in edit mode, hot key “u” will bring up a menu with different UV unwrap settings.
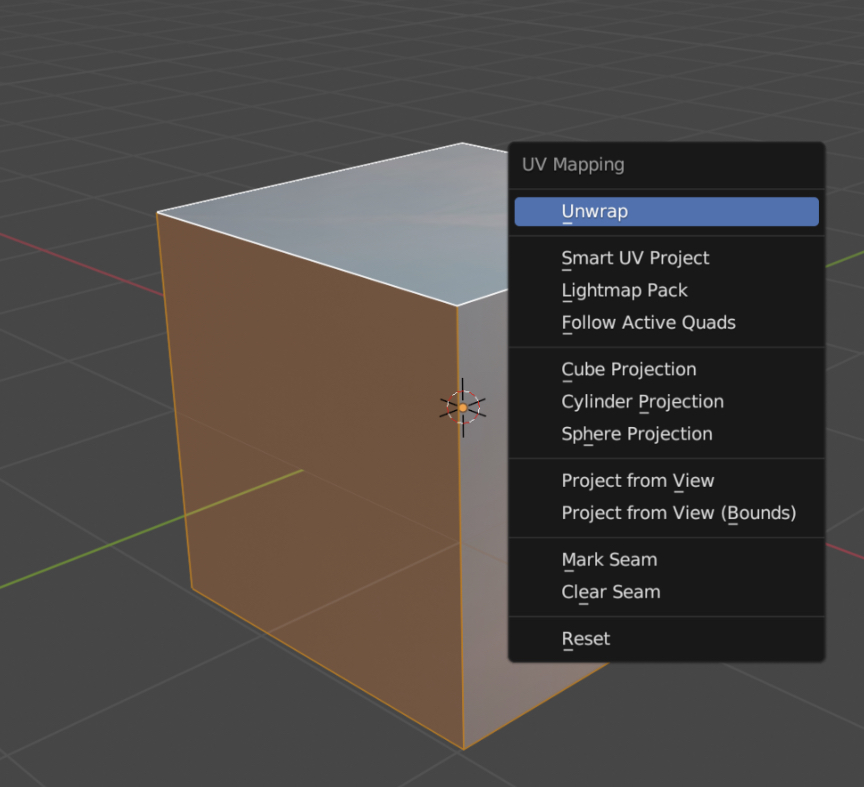
What are the Types of UV Unwrap
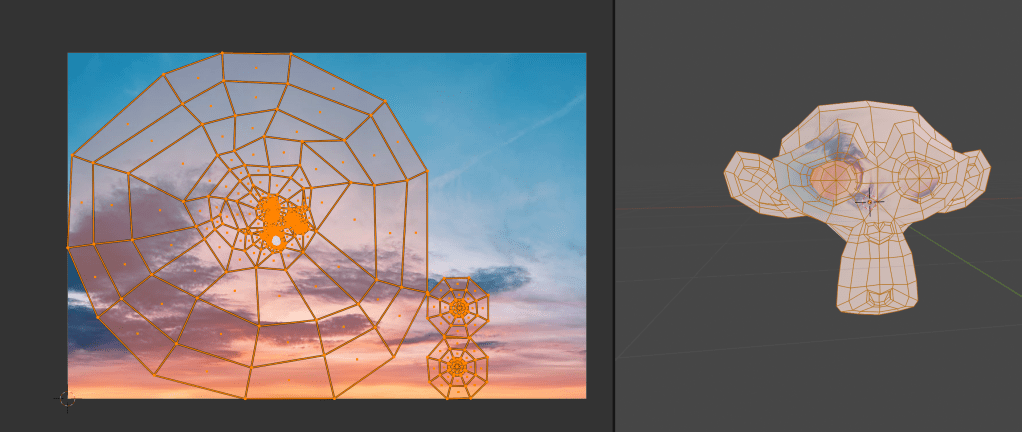
The Unwrap method will manually unwrap the UV map based on how faces and edges connect with each other. This method works by cutting along manually added seams to flatten the surface of the mesh. The default option is useful for organic shapes.
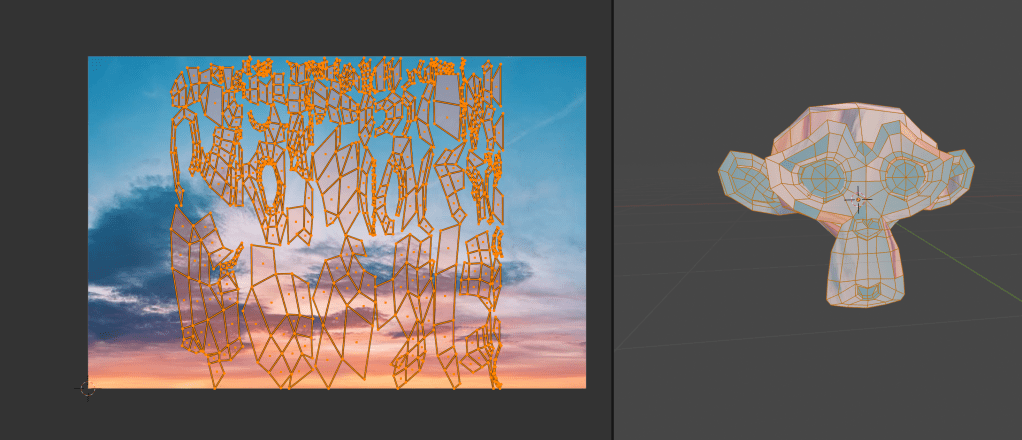
Smart UV Project is the best method for complex and simple objects such as mechanical tools or architecture. This method will cut the mesh into multiple “islands”, based on an angle given by the artist, resulting with a finer control over how automatic seams are created.
Cube Projection maps the texture onto each of the faces of a cube, creating six UV islands. In the UV editor, these faces will be overlapping, but can be moved.

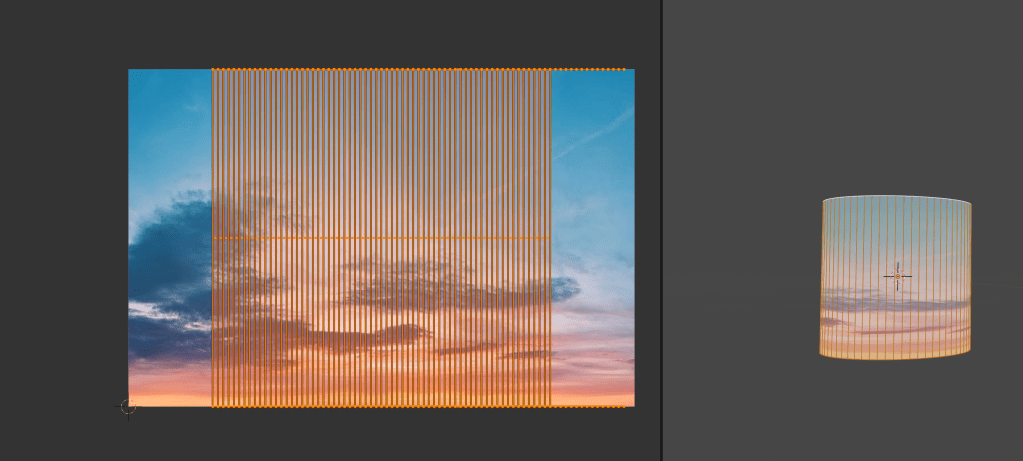
Cylinder projection projects the texture onto an object using a cylinder-shaped map. Something different about this projection is the fact that different views will map the UV differently, skewing the image if used.
Spherical mapping is similar to the cylinder projection, but the difference is that it takes into account the sphere’s curvature, and each latitude line becomes evenly spaced. This option is best used for eyes, globes, and any other round objects.

To summarize, UV mapping and texturing is a key step in the creation of a good render. This crucial skill allows artists to bring their concepts to life with realistic textures. With Blender’s powerful UV mapping tools and simple interface, artists can easily create high-quality textures that will enhance the visual appeal of their 3D models.

Leave a comment